People have been drying wood for centuries with both success and disasters. Successes are usually based on great quality with minimal drying times. Disasters are a result of poor drying conditions, either too slow or too rapid for the particular material. Knowing these Do’s and Don’ts can make all the difference. Let’s start in the woods and move up the value stream.
A lot of problems with wood drying actually start in the woods, particularly in regard to stain during the warmer months. There are two types of stains that occur in hardwoods and softwoods: fungal and chemical (often called enzymatic). Fungal stains are caused by a living fungus that consumes the sugars and starches in the sapwood.
Chemical stains are a result of oxidative darkening of chemicals produced by a particular living cell that is located in the sapwood. While these stains often don’t show up till later in the drying process, they often get started with the poor handling of logs. To prevent stains: Do: handle logs rapidly; get them out of the woods and processed rapidly. Don’t: for species with large amounts of sapwood, don’t let the logs sit in the woods or on the log yard for more than two weeks in the warmer months.
Once logs are sawn into boards and cants, the opportunity for both types of stain remain. For wood prone to chemical staining (white pine, hard maple, soft maple, ash, hickory and yellow-poplar), get the lumber on sticks and located in an area with good airflow within 12 hours of sawing. The longer the lumber remains in a deadpack, the greater the chances for chemical staining. This stain is often not detected until the lumber is further processed after drying.
Rapid drying means putting the lumber in a fast drying location on the yard, using a fan shed or going directly into dry kilns – all conditions with a good drying rate. To prevent chemical stains: Do: process lumber rapidly, get lumber on sticks rapidly, get rapid drying as soon as possible. Don’t: let the lumber sit over the weekend before stacking or wait to accumulate enough material to move into rapid drying conditions.
Chemical staining is not typically a concern with pallet material; the greater concern is with fungal staining. A good prevention for preventing fungal stains is the use of a lumber dip tank that contains a fungicide. The lumber dipping process protects the surface of the wood from staining fungi, even if drying rates are kept low. If you are handling pallet material and want to prevent fungal stains without the use of a lumber dip, rapid drying will achieve the same results. However, care must be taken as some species, like red and white oak, will check and split if exposed to high drying rates.
To prevent fungal stains: Do: use lumber dip if you cannot achieve rapid drying rates and customer allows use. Get material stacked and drying rapidly. Use lots of open space between material to achieve faster drying. Don’t: Let the material sit deadpacked for long time periods; store too much material in a closed area. A 1,000 board feet of wood holds about 2,000 lbs. of water, that’s a lot of water that can be released into the surrounding environment. The more wood, the more water, and in a small space, that means high relative humidity and the opportunity to grow mold or stain.
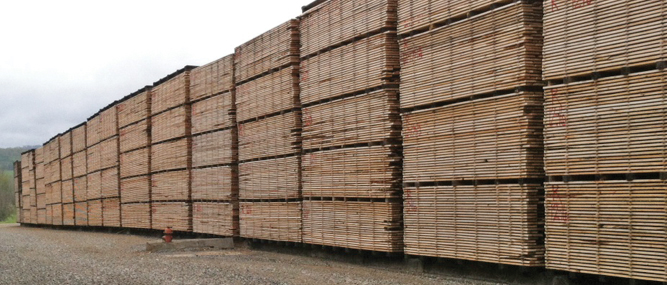
One of the most common ways to start the drying process is air drying. Air drying is a great way to reduce the moisture content of wood with no cost for energy. However, poor air drying can lead to large amounts of degrade (checks, splits, stain, warp); hence actually making it an expensive process. Proper air drying will allow for a greater number of kiln charges per year (lower moisture content going into the kiln means fewer days in the kiln to reach the target moisture content), and for many pallet manufacturers, provides the necessary moisture loss to prevent fungal staining of material.
Surface checks and end checks are a common form of degrade in air drying, particularly for the oaks or thick stock in any species. Both types of degrade occur during the first 1/3 moisture content loss during drying. If the drying rate is too high during this stage of drying, rapid shrinkage of the fibers on the outer layer of the wood or the ends can occur leading to wood failure. This is restrained by high moisture content wood in the core.
Do’s: use a cover over material being air dried. Low-grade lumber works well for this purpose. A cover will reduce splits and checks from direct sunlight and keep rain off the material. Make sure there is enough space between stacks of material. Keep material 12-16 inches off the ground. For high-grade material and thick stock use end coating. Use shade cloth on ends to prevent direct sunlight
Don’t: leave quality material air drying below a moisture content of 25%. The cost of degrade from the cycling of rain and drying will quickly reduce any savings of drying time in the kiln. Allow direct sun on the tops of piles or ends of lumber.
Another common way to dry some species of lumber and pallet material is the use of fan sheds. A bank of fans is used to force air though lumber stacked with stickers or through stacked assembled pallets. Air flow is critical for drying wood above the fiber saturation point or 30% moisture content. Above 30% moisture content, the higher the air flow, the greater the drying rate. By adjusting the fan speed, the drying rate can be adjusted. Do’s: Check the air flow through the material. Make sure the drying loss or moisture content loss per day is the rate desired. Fan sheds are commonly used on “white” woods or stain prone species. Be careful using a fan shed with check prone species. Don’ts: don’t put too much material in the fan shed. Make sure the air flow rates are high enough to achieve the desired moisture loss. Fans should not be run when the humidity exceeds 90%. This will result in re-wetting of the surface.
If you follow these common Do’s and avoid the Don’ts, you should be able to achieve the desired success in lumber drying. Remember that there are significant differences between the different species and thicknesses of material. As a result, you must use the appropriate practice to achieve the proper drying rate for your material.


